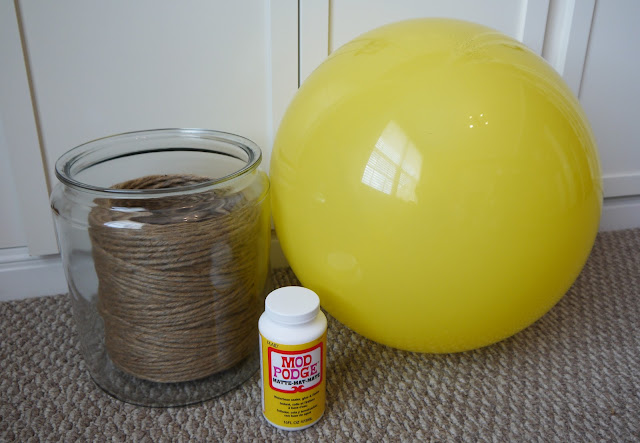
I first saw a picture of a twine light fixture on this blog. I did a little more "research" on Pinterest and we purchased the supplies we needed:
*Twine (Already had, purchased at Hobby Lobby for $15 with 40% off coupon. I am pretty sure Mom paid for this and then gave me half of the twine. So this twine was free. Thanks, Mom!)
*Ball (Target, $3)
*Mod Podge (We used 2 bottles from Hobby Lobby for $7.99 each with 40% off coupon)
*Mini Pendant Light Fixture (Lowes, on clearance for $15)
*Bowl
*Cardboard (or something to cover floor with)
*Gloves (This is a messy project!)
I started this project by tracing a circle on the ball using a cup that was just bigger than the light bulb we would be using.
Chad was in charge of figuring out how to make this twine ball shine. He came up with the smart idea of using a pendant light since all of the pieces were included. Chad had to tweak it some to make it fit properly inside the twine ball. And then we picked out a pretty light bulb since you would be able to see if through the twine.

Next, I poured the Mod Podge into the bowl. I ran the twine through the Mod Podge with one hand and pulled it out with the other while scraping the excess off. It was a total guess as to how much Mod Podge to leave on the twine. This was my first time using it. Say what?
We started to wrap the twine around the ball. This is where the doubt set in. It took two of us to do this. Chad held the ball and turned it while I guided the twine. We made sure to not cover the opening (traced circle) where the light kit would be installed. We rolled and wrapped until we ran out of Mod Podge. And then I prayed that this would actually work.
We hung the twine ball to dry in the garage...
... from a light. Worked like a charm!
While I was showing Mom the new/old table we bought on Craigslist for the dining room (I will show you soon), I realized Chad and Dad were inside hanging the light. I yelled at Chad to stop and let me take pictures. I explained that my readers (all 5 of them) want (and need) to know step-by-step how we created this light. He didn't listen, he just kept working on the light.
Chad had deflated the ball and removed it from the twine ball.
He used this long tool thing to attached the pendant to the top of the ball.
This is where I told Dad he was a big baller :) That's how he rolls!
Before completely installing the light, Dad turned it on to see if it actually worked.
And it did!
Even Dad was surprised!!
Knowing that it did work, Chad finished installing the light.
Here are some pictures of the light with the blinds closed... ooh!
And at night... aah!
And from underneath the light. So pretty! It is almost like a disco ball. We may have spun it around and did a little dance :)
And more some pictures during the day.
As you can see, the shelves are decorated! For the most part, they are done. I tried to use what I had and have only bought a few things on sale or clearance. I will probably tweak them a little more, but for the most part they are d-o-n-e.
I love the light and am so proud that it worked! And it was cheap!!
We are working on the table we bought and I will show you that soon. Then, I need to find chairs. And maybe swap out the window treatments...


I think I missed something, how did you get the ball out of there after the twine dried?
ReplyDeleteHi Ericka! Chad just deflated the ball and pulled it out. Easy, peasy!
DeleteThis is totally adorable! Do you find the twine heats up with the bulb at all?
ReplyDeleteThat was my first thought, that the heat would ruin the integrity of the twine. So, three years later, did it stand the test of time?
DeleteI recently came across your blog and have been reading along. I thought I would leave my first comment. I don’t know what to say except that I have enjoyed reading. Nice blog, I will keep visiting this blog very often.Chandeliers
ReplyDeleteBest work you have done, this online website is really cool with great facts.
ReplyDeleteLustre
I would like to have seen how the ball was attached to the pendant exactly. Is it screwed on??
ReplyDelete