Happy 13th Anniversary, Chad!
Although some days it feels like 85 years, most days are pretty good!!
AND -
Happy 8th Anniversary to Christopher and Stacy!

Tuesday, July 31, 2012
Monday, July 30, 2012
First sleepover
This past Saturday, the kids had their very first sleepover - at Gramma and Papa's house!


Chad and I dropped them off and RAN before Mom and Dad changed their minds! They had a blast and kept busy jumping at The Hoppin' House, eating burgers (the only hamburger Caleb will eat - and he eats the entire burger so we go there whenever he asks) and playing more at Mighty Fine, building with Magic Nuudles (Ade - go get these at Hobby Lobby!), eating snacks and more.
Thank you, Mom and Dad! It was nice to run errands and have a quiet meal - and a margarita or two:) And the kids were so excited! Olivia was packed and ready to go days before!
Thanks for doing it again this weekend!
Too soon?
Friday, July 20, 2012
How to make a twine wrapped light fixture
I have been looking for a new light for our dining room since Mom stole ours. I love the look of old schoolhouse light fixtures. We found the perfect one - and it was around $250. Way too much to spend for a dining room light... so I kept looking.
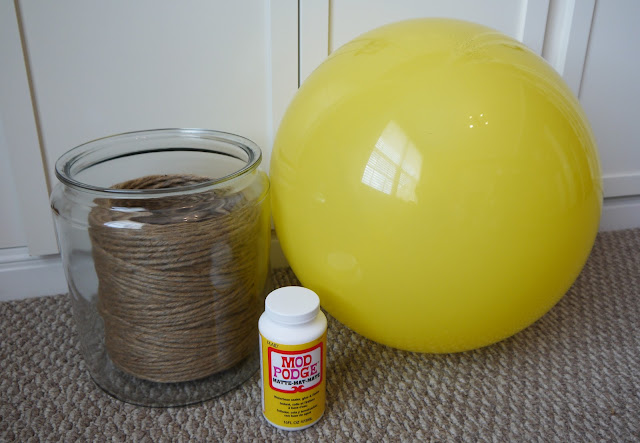
I first saw a picture of a twine light fixture on this blog. I did a little more "research" on Pinterest and we purchased the supplies we needed:
*Twine (Already had, purchased at Hobby Lobby for $15 with 40% off coupon. I am pretty sure Mom paid for this and then gave me half of the twine. So this twine was free. Thanks, Mom!)
*Ball (Target, $3)
*Mod Podge (We used 2 bottles from Hobby Lobby for $7.99 each with 40% off coupon)
*Mini Pendant Light Fixture (Lowes, on clearance for $15)

*Bowl
*Cardboard (or something to cover floor with)

*Gloves (This is a messy project!)

I started this project by tracing a circle on the ball using a cup that was just bigger than the light bulb we would be using.
Chad was in charge of figuring out how to make this twine ball shine. He came up with the smart idea of using a pendant light since all of the pieces were included. Chad had to tweak it some to make it fit properly inside the twine ball. And then we picked out a pretty light bulb since you would be able to see if through the twine.

Next, I poured the Mod Podge into the bowl. I ran the twine through the Mod Podge with one hand and pulled it out with the other while scraping the excess off. It was a total guess as to how much Mod Podge to leave on the twine. This was my first time using it. Say what?
We started to wrap the twine around the ball. This is where the doubt set in. It took two of us to do this. Chad held the ball and turned it while I guided the twine. We made sure to not cover the opening (traced circle) where the light kit would be installed. We rolled and wrapped until we ran out of Mod Podge. And then I prayed that this would actually work.

We hung the twine ball to dry in the garage...

... from a light. Worked like a charm!

While I was showing Mom the new/old table we bought on Craigslist for the dining room (I will show you soon), I realized Chad and Dad were inside hanging the light. I yelled at Chad to stop and let me take pictures. I explained that my readers (all 5 of them) want (and need) to know step-by-step how we created this light. He didn't listen, he just kept working on the light.
Chad had deflated the ball and removed it from the twine ball.
He used this long tool thing to attached the pendant to the top of the ball.


This is where I told Dad he was a big baller :) That's how he rolls!

Before completely installing the light, Dad turned it on to see if it actually worked.
And it did!
Even Dad was surprised!!

Knowing that it did work, Chad finished installing the light.

Here are some pictures of the light with the blinds closed... ooh!

And at night... aah!

And from underneath the light. So pretty! It is almost like a disco ball. We may have spun it around and did a little dance :)

And more some pictures during the day.


As you can see, the shelves are decorated! For the most part, they are done. I tried to use what I had and have only bought a few things on sale or clearance. I will probably tweak them a little more, but for the most part they are d-o-n-e.
I love the light and am so proud that it worked! And it was cheap!!
We are working on the table we bought and I will show you that soon. Then, I need to find chairs. And maybe swap out the window treatments...
I first saw a picture of a twine light fixture on this blog. I did a little more "research" on Pinterest and we purchased the supplies we needed:
*Twine (Already had, purchased at Hobby Lobby for $15 with 40% off coupon. I am pretty sure Mom paid for this and then gave me half of the twine. So this twine was free. Thanks, Mom!)
*Ball (Target, $3)
*Mod Podge (We used 2 bottles from Hobby Lobby for $7.99 each with 40% off coupon)
*Mini Pendant Light Fixture (Lowes, on clearance for $15)


*Bowl
*Cardboard (or something to cover floor with)

*Gloves (This is a messy project!)

I started this project by tracing a circle on the ball using a cup that was just bigger than the light bulb we would be using.
Chad was in charge of figuring out how to make this twine ball shine. He came up with the smart idea of using a pendant light since all of the pieces were included. Chad had to tweak it some to make it fit properly inside the twine ball. And then we picked out a pretty light bulb since you would be able to see if through the twine.

Next, I poured the Mod Podge into the bowl. I ran the twine through the Mod Podge with one hand and pulled it out with the other while scraping the excess off. It was a total guess as to how much Mod Podge to leave on the twine. This was my first time using it. Say what?
We started to wrap the twine around the ball. This is where the doubt set in. It took two of us to do this. Chad held the ball and turned it while I guided the twine. We made sure to not cover the opening (traced circle) where the light kit would be installed. We rolled and wrapped until we ran out of Mod Podge. And then I prayed that this would actually work.

We hung the twine ball to dry in the garage...

... from a light. Worked like a charm!

While I was showing Mom the new/old table we bought on Craigslist for the dining room (I will show you soon), I realized Chad and Dad were inside hanging the light. I yelled at Chad to stop and let me take pictures. I explained that my readers (all 5 of them) want (and need) to know step-by-step how we created this light. He didn't listen, he just kept working on the light.
Chad had deflated the ball and removed it from the twine ball.
He used this long tool thing to attached the pendant to the top of the ball.


This is where I told Dad he was a big baller :) That's how he rolls!

Before completely installing the light, Dad turned it on to see if it actually worked.
And it did!
Even Dad was surprised!!

Knowing that it did work, Chad finished installing the light.

Here are some pictures of the light with the blinds closed... ooh!

And at night... aah!

And from underneath the light. So pretty! It is almost like a disco ball. We may have spun it around and did a little dance :)

And more some pictures during the day.


As you can see, the shelves are decorated! For the most part, they are done. I tried to use what I had and have only bought a few things on sale or clearance. I will probably tweak them a little more, but for the most part they are d-o-n-e.
I love the light and am so proud that it worked! And it was cheap!!
We are working on the table we bought and I will show you that soon. Then, I need to find chairs. And maybe swap out the window treatments...
Thursday, July 19, 2012
It's a...
... light fixture!
I just LOVE how it turned out! I will be back later today to show you how we made it.

Did any of my 5 readers of this blog guess correctly? Do I only have 5 readers?
I just LOVE how it turned out! I will be back later today to show you how we made it.

Did any of my 5 readers of this blog guess correctly? Do I only have 5 readers?
Monday, July 16, 2012
What is this?
Here is the latest project we are working on. It is just about finished, but will take a couple days to dry completely. Then, I will be able to show you the finished product.
What is it?
Where will it go?
Any ideas?!
Mom, you cannot guess.

What is it?
Where will it go?
Any ideas?!
Mom, you cannot guess.

Wednesday, July 11, 2012
San Antonio day trip
San Antonio is the perfect day trip. It is not too far away, there is plenty to do and the kids are so tired they fall asleep on the way home :)
Here is how we spent our day last week. Get ready, there are a lot of pictures. You were warned.
We start each visit to the River Walk the same way every time... the Rainforest Cafe. Ella still clings to me when the lights dim and the "storm" begins. She used to cry, so I guess we are making progress:)

After some walking, we enjoyed some ice cream!


I had strawberry cheesecake.

The best part of being on the River Walk is people watching. Hello, mariachi band. We will see you later...

At the Buckhorn Museum and Saloon, the kids had their fortunes read.

I think Olivia thought she was real.

Chad read Olivia her fortune and she asked him if it was true... such a serious little girl.

Ella found a friend.

Caleb found a wall of guns.

Caleb shot some guns.

Then the whole family shot some guns. Aw, family time. With guns.

We posed in some crazy mirrors. Check out my legs!

Silly Caleb!

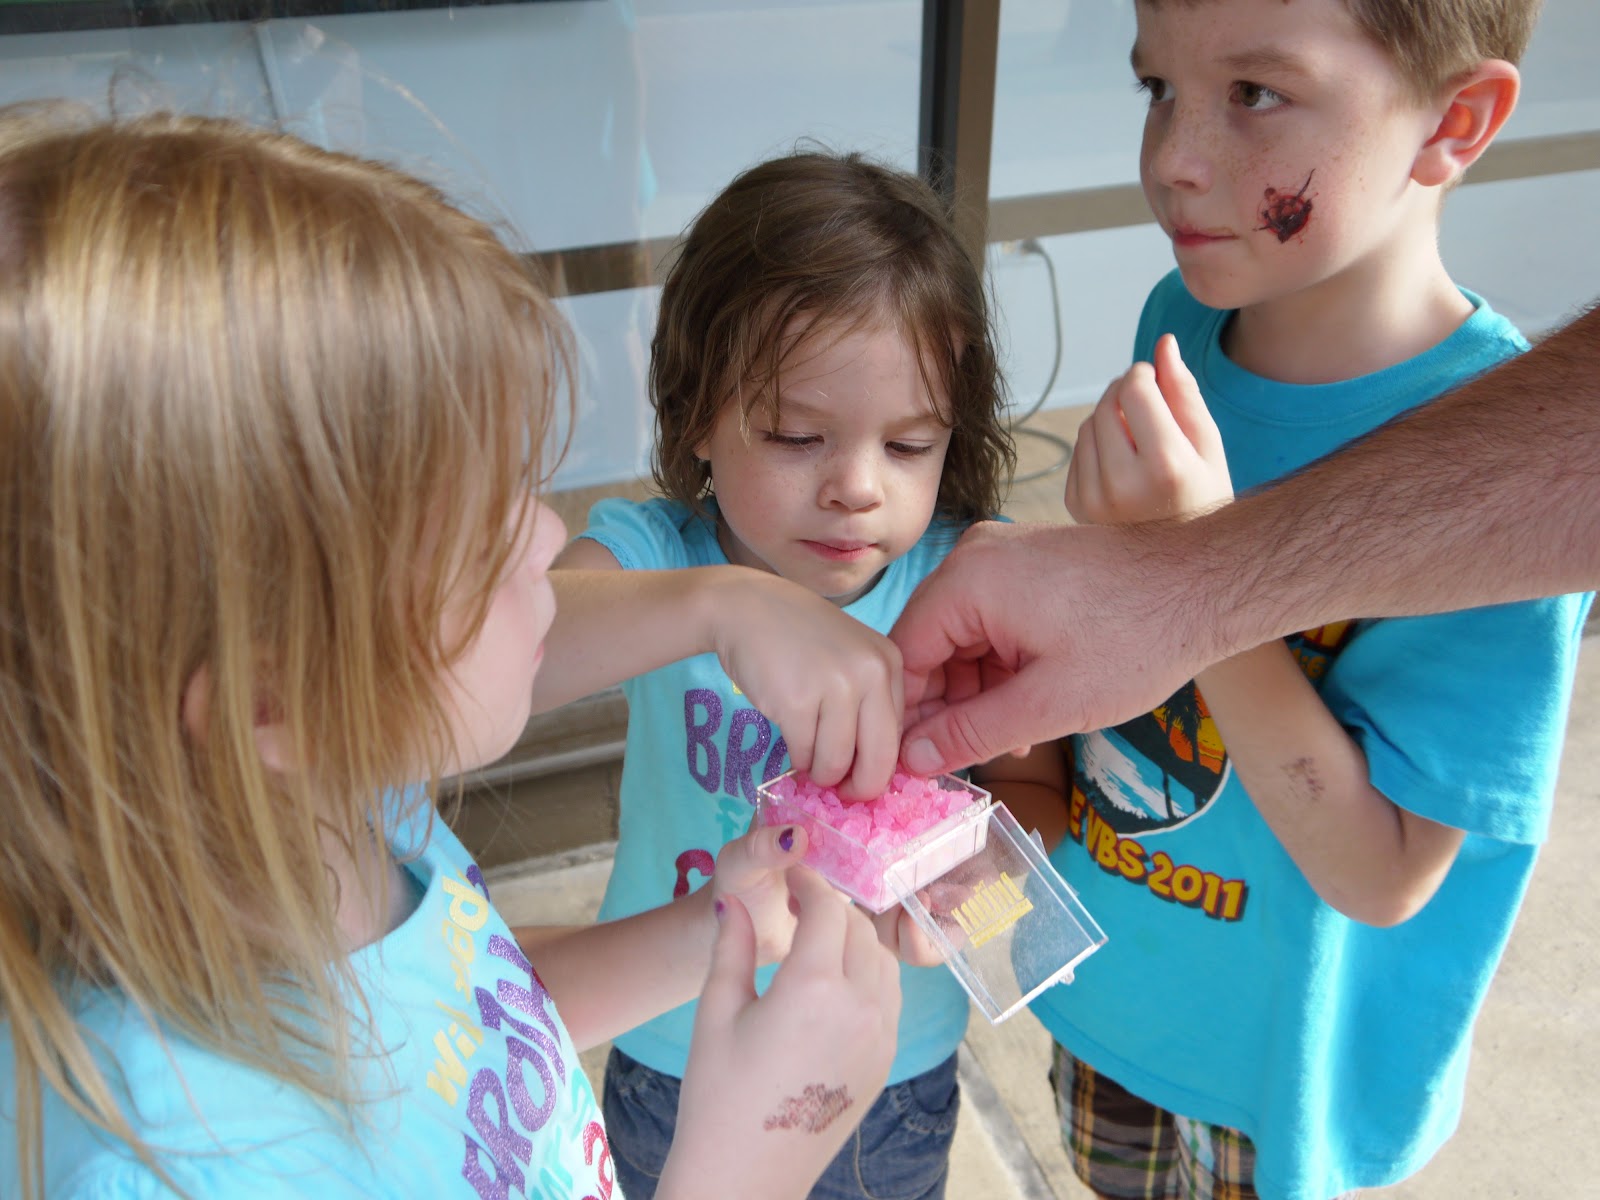
The kids picked out rock candy and LOVED it!

After leaving the museum, we walked some more. We found lots of little stores full of souvenirs - and hats!


Ella set up shop with the Alamo rocks - literally. If you look closely, you can see that she filled bags full of the pretty rocks. She then lined up the bags and was ready to sell them!

We then walked down to the Alamo... or as Caleb called it the Elmo.

We end each visit to the River Walk the same way every time - at an Italian restaurant called Michelino's. The food is really good, the kids love the bread and you can people watch while you eat!
The kids love playing Where's my Perry? on my ipad.


The mariachi band serenaded us while we dined. I am pretty sure it was the chicken dance song and the man with the trumpet crowed (is that what you say?) like a rooster.

Look - Olivia's front teeth are finally coming in. I have to admit, I am a little sad. She was so cute without teeth:)

This is what the kids did to six loaves of bread. They ate just the middle.

We asked Caleb to take our picture. Not the best idea...


Olivia photobombed this picture... awesome!

Here is how we spent our day last week. Get ready, there are a lot of pictures. You were warned.
We start each visit to the River Walk the same way every time... the Rainforest Cafe. Ella still clings to me when the lights dim and the "storm" begins. She used to cry, so I guess we are making progress:)

After some walking, we enjoyed some ice cream!


I had strawberry cheesecake.

The best part of being on the River Walk is people watching. Hello, mariachi band. We will see you later...

At the Buckhorn Museum and Saloon, the kids had their fortunes read.

I think Olivia thought she was real.

Chad read Olivia her fortune and she asked him if it was true... such a serious little girl.

Ella found a friend.

Caleb found a wall of guns.

Caleb shot some guns.

Then the whole family shot some guns. Aw, family time. With guns.

We posed in some crazy mirrors. Check out my legs!

Silly Caleb!

The kids picked out rock candy and LOVED it!
After leaving the museum, we walked some more. We found lots of little stores full of souvenirs - and hats!


Another favorite of the day - magnet rocks!


Ella set up shop with the Alamo rocks - literally. If you look closely, you can see that she filled bags full of the pretty rocks. She then lined up the bags and was ready to sell them!

We then walked down to the Alamo... or as Caleb called it the Elmo.

We end each visit to the River Walk the same way every time - at an Italian restaurant called Michelino's. The food is really good, the kids love the bread and you can people watch while you eat!
The kids love playing Where's my Perry? on my ipad.


Chad and I ordered margaritas!

The mariachi band serenaded us while we dined. I am pretty sure it was the chicken dance song and the man with the trumpet crowed (is that what you say?) like a rooster.

Look - Olivia's front teeth are finally coming in. I have to admit, I am a little sad. She was so cute without teeth:)

This is what the kids did to six loaves of bread. They ate just the middle.

We asked Caleb to take our picture. Not the best idea...


Olivia photobombed this picture... awesome!

We gave up on the picture, finished eating and headed back home. All in all, a great day!
Subscribe to:
Comments (Atom)